Windows 11/10, as well as an older version of Windows, shows the date and time in the Taskbar. If you want to display the time of any time zone, you can add multiple clocks. If you’re going to do the same with the Start Menu, this guide will be helpful.
Add a clock to Start Menu in Windows 11/10
To add a clock to Start Menu using Alarms & Clock app in Windows 11/10, follow these steps- Open the Alarms & Clock app on your Windows 10 PC. In case you removed the app, you need reinstall preinstalled apps in Windows 10 and go ahead. After that, switch from the Alarm tab to the following tab:
The Clock tab in Windows 10The World Clock tab in Windows 11
If the time zone that you want to show in the Start Menu, is already visible in the Alarms & Clock app window, you do not need to do anything. If you do not see the time zone or location, click the plus(+) sign that is visible at the bottom of the window.
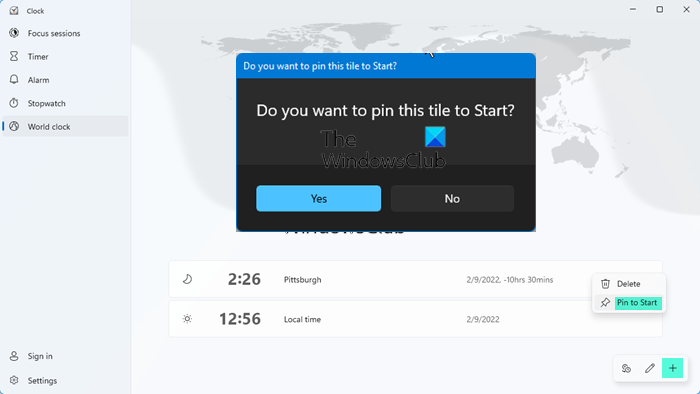
After that, type the location and select it accordingly. Now, right-click on the visible location/time in the Alarms & Clock window and select Pin to Start option and click the Yes button.
The clock should be visible in the Windows 10 Start Menu immediately.
In the Windows 11 Start Menu, however, the icon gets pinned, which when clicked on, opens the desired clock. As mentioned earlier, you can add multiple time zones and clocks to the Start Menu. For that, you must follow the same steps. Also, it is possible to resize the tile, and there is no additional guide if you already know the process. You can right-click on the tile, select Resize and choose a size that you prefer. To remove a clock from the Start Menu, you need to right-click on the tile and select Unpin from Start option. I hope this simple tutorial will be helpful for you.