Add Print Directory feature to Explorer
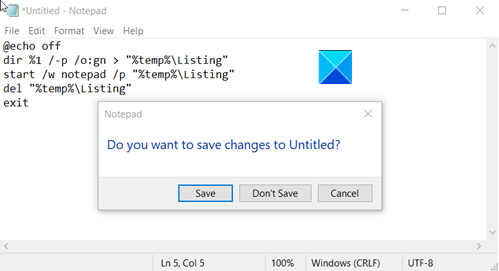
By completing this exercise successfully, you can enable printing of the directory listing from within File Explorer of Windows 10. Refer to the list of instructions given below! The method explains to you how to modify the registry. However, serious problems might occur if you modify the registry incorrectly. Make sure that you follow these steps carefully. Also, we recommend you back up the registry before you modify it. You can restore the registry if a problem occurs. Click Start, click Run, type notepad, and then click OK. Paste the following text into Notepad: Now, go to the File menu in the upper-left corner and select the Exit option from the list. Then hit the Yes button to save the changes.
When the Save As dialog box appears, type the following text in the File name box – %windir%\Printdir.bat. When done, hit the Save button. Now, as recommended by Microsoft, again, open Notepad. Type the following commands in Notepad.
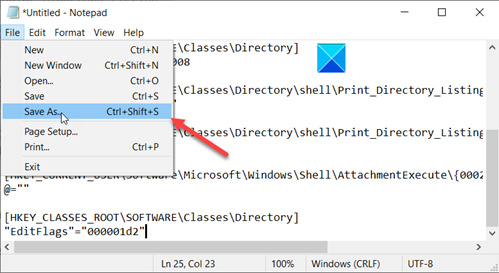
Go to the File menu, choose Save As, and select Desktop from the ‘Save in’ list.
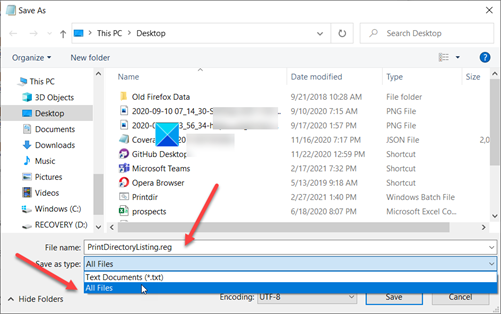
Enter PrintDirectoryListing.reg as the file name in the box. Expand the drop-down menu of the Save As type list and choose All Files. Then, click Save.
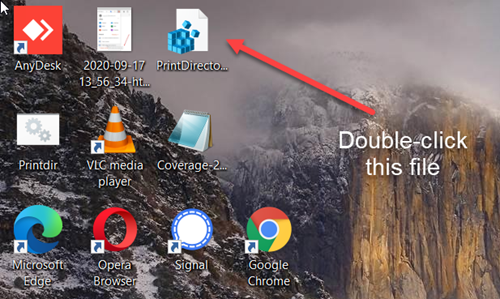
Now, go to your Desktop and double-click the LoggingOn.reg file to add the registry keys to the Windows registry. Click OK in the message box. This should help!