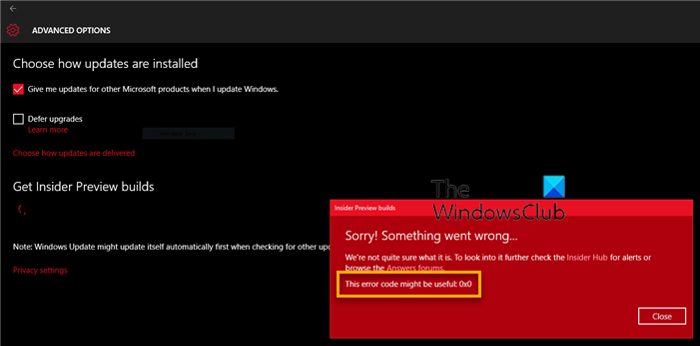
What causes Error Code 0x0 for Windows Insider Builds?
Insider Builds are Beta builds – so errors can be expected. The reason you are facing Error Code 0x0 for Windows Insider Builds during an upgrade is due to issues associated with your system’s configuration settings. But along with this, the issue can also trigger due to the following reasons too- Now that you have a prior piece of knowledge about different reasons behind the problem let’s look at how to eliminate them.
Error Code 0x0 for Windows Insider Builds during upgrade
Below is a list of all the practical workarounds you can try to Error Code 0x0 for Windows Insider Builds during upgrade. Now, let’s take a look at all these solutions in detail.
1] Eliminate unnecessary background running applications
The first thing that can trigger the problem is conflicting applications running in the background. As it turns out, two applications built for the same purpose but by a different firm can compete against each other in the background and cause the mentioned problem. In this situation, the best thing you can do is close all the conflicting applications from the background. You can do so by following the below steps. Now, check if you are still facing the error message. If yes, try the next solution.
2] Tweak Windows Registry
As mentioned, the problem is mainly occurring due to issues associated with the configuration settings of your PC. In this position, changing the Windows registry can be an effective solution. Here are the changes you need to make in the Windows registry. Note: Make sure you follow the below steps carefully, as serious problems can occur if you make any wrong move in the registry. We recommend backing up the registry before getting into the steps. This will ensure that you can restore the registry if anything wrong happens. To begin with, open the Run dialogue box by pressing the Windows + R shortcut key. In the space provided, type regedit and press the enter key. It will open the Registry Editor. Now, head towards the below mentioned location. Right-click on WindowsSelfHost, and from the context menu, choose the Delete option. Now, exit the window and restart your system. Check if you are still facing the problem. See: How to fix Error 0xc1900107.
3] Run the Disk Cleanup Utility
A large number of temporary files stored on your system can be another significant reason causing the problem. These files don’t affect the system performance, but they can sometimes cause issues during Windows upgrade. Thus, it’s vital to keep clearing these temporary files regularly. You can do so using Disk Cleanup. Once the cleanup is complete, check if the problem continues. If yes, try the next solution. Similar: How to fix Error Code 0x0 0x0 on Windows computers
4] Run the SFC and DISM scan
Damaged or corrupted system files can be another primary reason behind the Error Code 0x0 for Windows Insider Builds during upgrade. You can get rid of such files by running DISM and SFC scans using Command Prompt. Once the scanning process is complete, check for the problem. If it persists, continue with this troubleshooting guide.
5] Reset the PC
If none of the above steps were helpful, the last thing you can try is to reset your Windows PC. Resetting is the last but the best way to eliminate any Windows error, and that too without losing any of your crucial files. So, here’s how to reset your system. Now, follow the on-screen instructions to reset the PC. Read: Your Microsoft account requires attention to get Insider Preview builds
What is error code 11 in PC?
The error code 11 occurs on your Windows PC when you try to access a device that is having some internal issue. Whenever you come across this error message, your system will become unresponsive for a short period. You can solve the problem by replugging the problematic device.
Why do I keep getting error code 5?
The error code 5 on Windows 11/10 indicates that you don’t have the required permissions to access a file or folder. The problem is mainly caused due to account permissions. You can change the UAC settings, switch to the admin profile, and run the problematic installer in administrator mode to solve the issue.

