Even with HDR Playback enabled, you need a display that supports it. In case you are not sure, make sure to use the DirectX Diagnostic Tool to check if you have correctly wired it, have the latest WDDM 2.4 drivers installed, and other settings set correctly. Today, we will see how to calibrate your display for HDR video in Windows 11/10.
Calibrate the display for HDR video in Windows 11
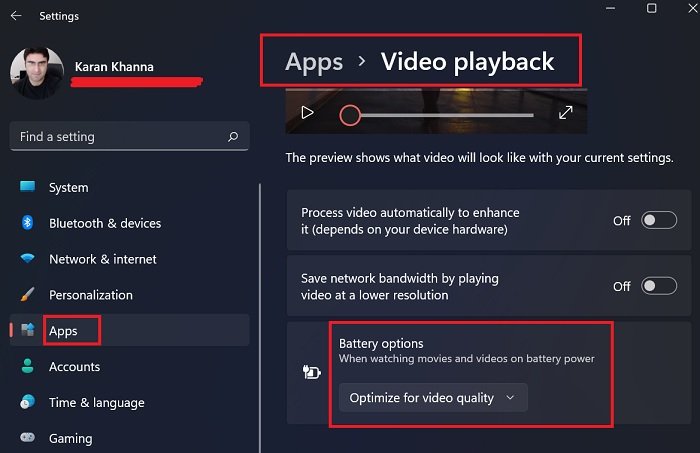
The Video Playback settings are significantly different for Windows 11 in comparison to Windows 10. Rather, it isn’t just changing the names or locations, but the type of the menu.
1] Open Video Playback
The procedure to optimize the system for Video quality is as follows: TIP: You can use the Windows HDR Calibration app
2] How to Calibrate
The procedure to calibrate HDR on Windows 11 is as follows:
Calibrate display for HDR video in Windows 10
Now that you are sure that your display supports HDR, and you have enabled HDR Playback, let’s calibrate. When calibrating the display, if you are using an external monitor for HDR, make it your primary display, and then adjust the settings. If you are calibrating for primary display, disconnect all other displays.
1] Open Video Playback
Navigate to Settings > Apps > Video Playback. In Video playback settings, clear the Don’t increase display brightness when watching HDR video on battery checkbox, or plug in your PC.
2] How to Calibrate
Click the Change calibration settings for HDR video on my built-in display link on the right side. In the next screen, tap on the Full Screen using double arrows button on the right side. Then tap on the Play button on the left side to play the video. Now you can move the sliders to the left or right to calibrate. When you feel the quality of the image is exactly what you feel is best for you, stop. Here is a tip about calibration. The goal is to find the right balance between details in darker parts of a scene. Let’s take an example of Mountains in the background, and buildings in the front.
To add more details to the snow on the mountain, drag the slider to the right.To add more details to the buildings, drag the slider to the left.
You can then pause the video, and exit the full-screen mode. Remember, HDR is a personal choice as well. Some would like much brighter shade, while others would just want a little darker mode.
In case you are not happy with how your HDR video looks, you can try calibrating again. To go back to default HDR video calibration, click/tap on the Reset calibration button. Lastly, you should know a few things.
You can only see HDR content on the full screen.When using Laptops, make sure to watch videos when plugged in, and cross-check that none of the battery settings have lowered the brightness.
Hope this helps!
What if I do not calibrate my system for playing HDR videos?
Even if you do not calibrate your system for playing HDR videos, it will play them. But in that case, the effect won’t be the same. Thus, calibration is important for playing HDR videos.
My system still doesn’t play HDR videos with the same display quality. How to fix it?
First of all, please check whether or not your system’s display supports HD resolution. Is it designed for 720p display or 1080p display? If the hardware isn’t supportive, software changes wouldn’t be helpful.