How to enable Start Screen in Windows 10
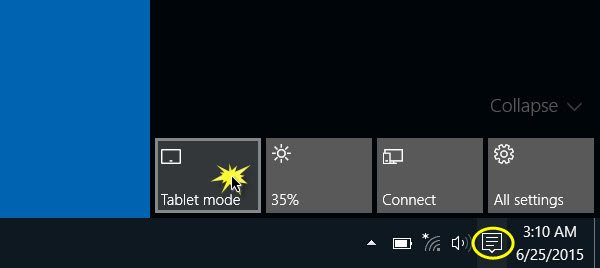
When Windows 8 used to boot to Start Menu, people wanted to boot directly to the Desktop. Now when Windows 10 boots to desktop, there are some who want to boot to the Start Screen directly. To enable Windows 10 Start Screen, you will have to enable Tablet Mode in Windows 10. To enable Windows 10 Tablet Mode, click on the Notifications icon in the taskbar. You will see the Notifications panel open.
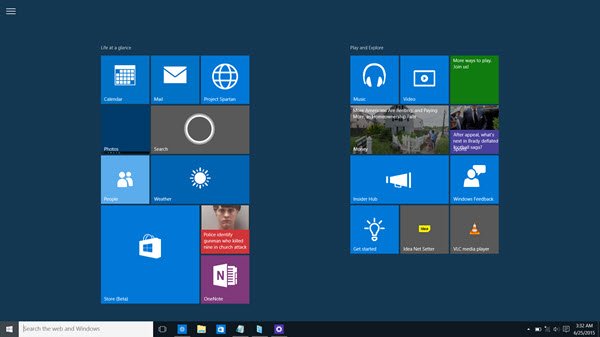
Click on Tablet mode. The Start Screen will be enabled. The Continuum feature allows Windows 10 to switch between the Desktop and Tablet mode seamlessly. To see the Start Screen, click on Winkey or on your Start Button.
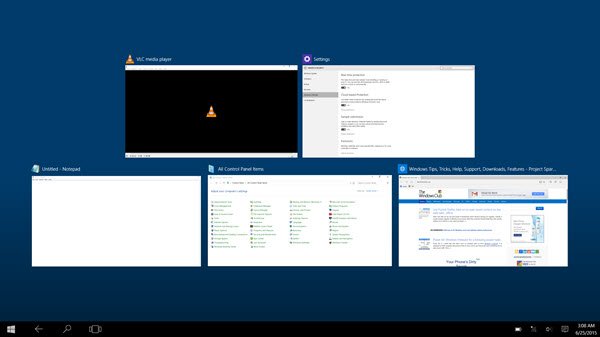
Your active application will go full-screen, and the Start Screen will be enabled. You will see a change in the taskbar. Open apps will no longer rest on the taskbar. You will see only a Back button, a Search icon and the Task View button. Task View is a new desktop feature in Windows 10 that allows users to create multiple desktops on the same Windows PC. It also allows for quick switching between open files and apps. To launch new apps and desktop software you will have to do so via the Start Screen. To see the open apps, you will have to click on the Task View button, or cycle through them using Alt+Tab keyboard shortcut.
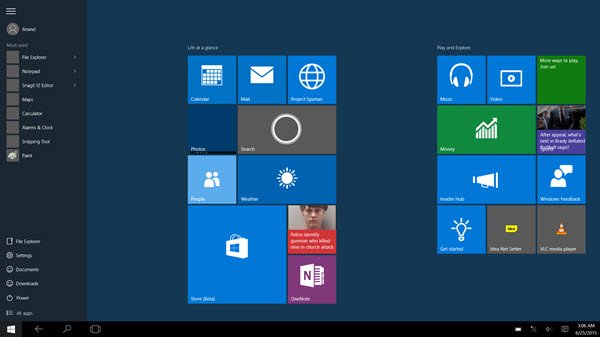
You will notice that the Windows 10 Start Screen now scrolls vertically. You will also see a 3-lined Hamburger menu. Clicking on it will open the ‘left side of the panel’ which was present on the Start Menu. This includes Most used, Recently opened and Other links.
Enable Start Screen without enabling Tablet Mode
If wish to enable Start Screen without enabling the Tablet Mode, then the best option for you would be to enable full-screen Start. There seems to be no option to have the Start Screen in the Desktop mode, like we had in Windows 8.1.
Enjoy Windows 10! TIP: You can enable Windows 10 Full-screen Start Menu using Group Policy or Registry.


