Make your Local Servers public with Secure Tunnels
What is ngrok security
What is ngrok? How to use ngrok? ngrok lets you expose local servers behind Firewalls, to the public internet over secure tunnels. The tool requires zero configuration and comes with an inbuilt network interceptor. Tunneling has been prevalent for years now, most of the VPNs also use the concept of tunneling for giving you unrestricted access to websites. Similarly, ngrok creates a secure tunnel between the public internet and your localhost server. Basically, you can make any website/web-app/web-service running on http://localhost:8080 accessible via the internet with a single command.
Most of the features offered by ngrok are free to use. And freeware limits are good enough for an intermediate developer who is looking to test their application. Although ngrok is also offered as a service, it is totally optional to skip that part and directly download the tool and get going.
How to use ngrok
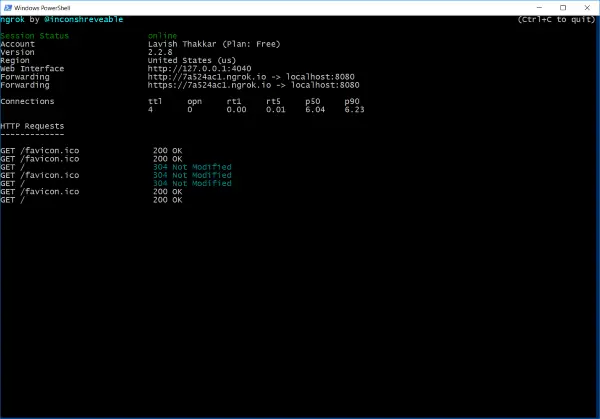
You can sign-up for ngrok, and it is free. Creating an account will let you manage all your active tunnels from a cloud-based dashboard. How to expose your local web server to the internet Creating a tunnel to your local web server or any server is very simple. Download and unzip ngrok. Now open a CMD/PowerShell window and navigate to the folder where the unzipped contents are. Now execute the following command to create a secure tunnel to your local server. Where 8080 is the port on which your server is listening. If you are not sure about the port number, go to the default port number that is 80. If you want to connect this ngrok instance to your account, you should provide the authentication token before executing the above command. To do so, log in to your ngrok account. Obtain your auth token from there and then execute following command in a CMD window. This is just a one-time action and needs not to be repeated every time. Once you’ve created a tunnel, ngrok will display the public URL to your server. The public URL is a subdomain of ngrok.io and is generated randomly. You can even create persistent and easy-to-read customizable subdomains, but for that, you need to upgrade to a paid plan. I think the default URLs are good enough for testing your application. You should consider upgrading only if you want something production grade and persistent.
ngrok Interceptor
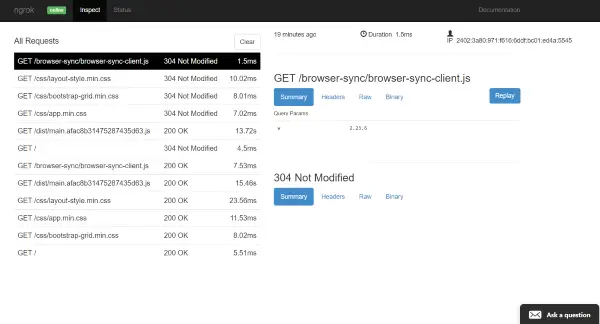
ngrok also comes with an inbuilt interceptor that can be opened by opening http://127.0.0.1:4040. The interceptor will let you view all the incoming network requests and their responses. Interceptor comes very handy when you are debugging something or want to view the incoming requests. Beside the interceptor, you can find the status tab. This tab would let you view all sort of information about your tunnel. You can view some stats like connections, connection durations, HTTP requests, server addresses, and protocols.
With the free plan, you can only create one tunnel at one time. Consider upgrading if you want to run more than one simultaneous tunnels. ngrok is a useful tool for developers and enthusiasts. It lets you convert your existing localhost server to a public server that can be accessed from anywhere. I was introduced to this tool in a hackathon. And ngrok can be really very useful in hackathons, demos, presentations, mobile-app testing, webhook integrations and all those cases where you want to run your application without actually deploying it. ngrok is free to use, and the tunnels are super easy to create, which lets you focus more on development. Click here to download ngrok. It is free for non-commercial use.
Are ngrok tunnels secure?
As per the official statement, ngrok tunnels are entirely secure and encrypted. All traffic goes through secure tunnels that are encrypted by high-level encryption supported by the TLS tunnel option. While testing it on our computer, we could not find any issue that demonstrates the insecurity.
How do I forward my local port to public using ngrok?
To forward your local port to Public using ngrok, you need to set it up first on your computer. For that, you can go through the aforementioned steps so that you do not encounter any issues while doing so. Next, you can use the Command Prompt, Windows PowerShell, or Windows Terminal to get things on the line. For your information, you need to use the CMD with administrator permission to get more options.


